Source Filmmaker (SFM) compilation is a vital process that creators need to produce quality 3D animated content. The digital world now features real-time rendering and high-speed GPU pipelines, yet compiling digital assets remains key to achieving professional results. Valve’s free development tool lets users create impressive 3D animated movies with assets from Team Fortress 2, Half-Life, and other Valve games.
Becoming skilled at SFM compilation goes beyond simple animation techniques. Many films created with SFM have earned Steam Awards and featured in TF2 events. These films have gained recognition in online film festivals. Creators learning fortnite sfm compile or sfm compile club resources need to understand the core principles. The tool compiles multiple assets at once and saves time when creators work with many models or animations. Users need to consider how to compile external content properly. This makes the process both frustrating and fascinating to creators.
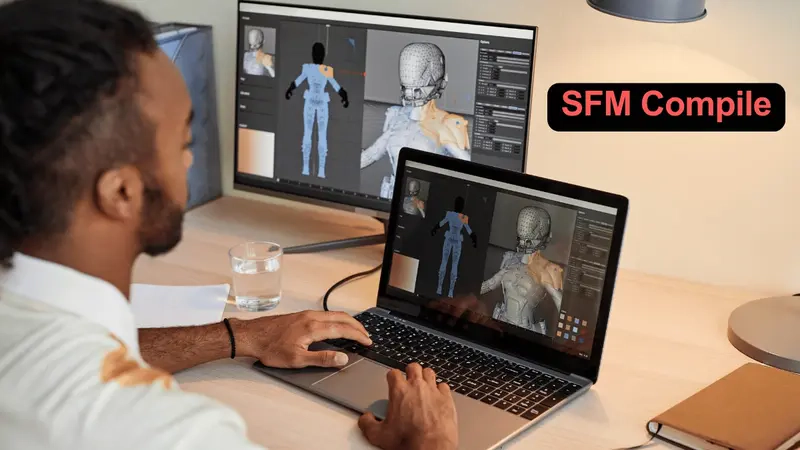
Table of Contents
Understanding the SFM Compile Process
Source Filmmaker’s technical foundation relies on its compilation process that turns raw creative elements into final, usable outputs. Creators need to understand this process really well to create professional animations and avoid common mistakes.
What does ‘compile’ mean in SFM?
Source Filmmaker’s compile process turns raw assets into formats that the Source Engine can understand and use effectively. The process acts like a translator between human-created content and what the engine needs. Raw files like .SMD, .DMX, or .QC are converted into game-ready binary formats such as .MDL for models or .BSP for maps.
SFM’s compilation involves key steps like scene setup, rendering, and post-processing. Models in formats like .FBX, .SMD, .DMX, or .OBJ are converted to the required .mdl format. The system also turns textures from .PNG or .TGA into .VTF and .VMT formats, while animations become .ANI or .VCD files.
This technical conversion does more than just change formats. Creators can set up physics properties that control clothing movement, add collision boxes, and make assets run better during compilation.
Why compiling is essential for animation output
The bridge between creative vision and technical execution depends on proper compilation. Custom assets won’t work in SFM without this vital step, which can lead to missing textures, broken animations, or models that don’t load at all.
Compilation brings several clear benefits:
- Raw animation data becomes playable video formats
- Better rendering with less lag and processing strain
- Better visual effects including motion blur, depth of field, and lighting
- Video editing software can work with the output
- Fewer problems like flickering, texture glitches, and frame stuttering
Compilation marks the final stage of your SFM experience. You can share your videos beyond SFM after setting up characters, cameras, lighting, and timeline. A well-done sfm compile will give you exactly what you planned, keeping visual quality, timing, and sound clarity intact.
Types of content you can compile
SFM handles different creative elements that need specific formatting:
- Models: Studiomdl or Crowbar turns SMD into MDL format
- Textures: VTFEdit converts PNG, JPG, or TGA into VTF format
- Animations: 3D software exports get compiled with QC scripts into SMD format
- Maps: Hammer Editor creates BSP format
SFM also provides different ways to compile and render projects:
- Image Sequence Export: Each frame saves as separate PNG, JPEG, or TGA files, giving the best quality without compression issues
- AVI Video Rendering: Creates AVI files directly, which is easier but might have some compression artifacts
- Poster Rendering: Makes high-resolution still images, perfect for thumbnails and promotional art
Your creative vision will look exactly right on screen if you understand these compilation processes, whether you’re working with fortnite sfm compile projects or other game assets.
Step-by-Step: How to Compile Your First SFM Animation
Making your first animation in Source Filmmaker is an exciting step for any digital creator. The process turns your creative work into content you can share with others. Here’s a detailed guide to help you through your first SFM compile process.
1. Prepare your scene and timeline
Your animation needs to be ready before you start rendering. Take time to review your timeline. Go through it frame by frame to make sure everything looks right. Look for any missing assets, animation errors, or lighting issues that could affect your final output.
Use Shift+F5 to preview how the lighting will look in your final render. This is a vital step to check your camera framing and post-processing effects, including depth of field, bloom, and motion blur.
The shot camera will give you better quality than the work camera. Many creators make this mistake. Using the right camera will make sure your planned shots look exactly how you want them in the final animation.
After you’ve prepared your scene, you can access the export dialog:
- In the top menu bar, click on File
- Select Export from the dropdown menu
- Choose Movie… from the submenu
You can also use the keyboard shortcut Ctrl+M to open the export dialog. The Export Movie dialog box has all the settings you need for your sfm compile process.
3. Choose the right output format
SFM gives you several output formats for different needs:
AVI format works best for quick previews and fast renders. Just keep in mind that SFM’s AVI export creates uncompressed files, which can be very large.
Image Sequence in TGA or PNG formats delivers the highest quality. Each frame saves as a separate image file, which gives you more flexibility for post-production. Professional sfm compile fortnite creators often choose this method because it protects their work if the system crashes.
3D projects like fortnite sfm compile or futa sfm compile need stereoscopic rendering. You can turn this on in the Layoff Settings tab by checking “Render Stereoscopic”.
4. Set resolution and frame rate
SFM starts with 720p (1280×720 pixels) by default, but you can change this:
Higher resolutions like 1080p or 4K need changes to SFM’s launch options. Add -sfm_resolution [height] -w [width] -h [height] to your SFM launch options in Steam.
The Layoff Settings tab lets you change the frame rate. Check “Override frame rate”. Most videos use 30 FPS, while 60 FPS creates smoother motion.
Better quality renders need more samples. Right-click the viewport, select “Render Settings,” and set “#Samples” to at least 256. For the best quality, use 1024.
5. Start the render process
Click Export Movie when you’re ready to start the sfm compile process. Rendering time varies based on your system and scene complexity.
Tips for better rendering:
- Don’t use Alt+Tab while rendering as it slows things down
- Keep your computer plugged in and awake
- Complex projects from sfm compile club might need overnight rendering
Image sequences need combining into video files. You can use VirtualDub, DaVinci Resolve, or Adobe Premiere for this step.
Quality takes time. Professional fortnite sfm compile projects look great because creators take their time with rendering.
Tips to Improve Render Quality and Speed
The quality of your SFM renders can make the difference between amateur-looking outputs and professional animations. A few technical adjustments can improve both quality and efficiency without expensive hardware upgrades.
Use image sequences for better quality
Image sequences deliver better quality than direct video rendering in SFM. The best results come from choosing “Export > Movie > Image Sequence” instead of standard video formats. This method prevents compression quality loss and creates separate frame files (typically PNG or TGA format).
Image sequences give you a vital 32-bit workflow advantage. The PFM option outputs 32 bits per channel—this is a big deal as it means that you get more data than the 8 bits from other formats. This extra data depth helps with color grading and effects in post-production.
Image sequences also protect you from losing hours of work. System crashes during rendering will only affect your current frame rather than the whole project.
Adjust sampling and lighting settings
Your final output quality depends on progressive refinement settings. The “Render Settings” menu needs these sampling adjustments:
- Boost Depth of Field samples from the default 8× to 1024× for better quality
- Push Motion Blur samples up to 256× to smooth out animations
- Change motionBlurQuality and depthOfFieldQuality attributes for individual shots instead of the entire project
Lighting optimization affects quality and render speed equally. SFM renders the scene one extra time for each light with shadows. You can speed up rendering by turning off shadows on less important lights without losing visual quality.
Ambient occlusion takes up significant render time in complex projects like fortnite sfm compile animations. Turn this setting off during your workflow to speed up viewport performance, and enable it only for final renders.
Avoid multitasking during rendering
System resources become critical once the sfm compile process starts. Your computer should focus solely on rendering—especially for fortnite sfm compile or other resource-heavy projects.
Adding RAM beyond 3GB barely helps because SFM runs as a 32-bit program with memory limits. The quickest way to handle complex animations from sfm compile club is to render them overnight.
Remember to keep your mouse still during renders with high RGB values to prevent color artifacts in the final output.
Common SFM Compile Mistakes to Avoid
Common mistakes can ruin your SFM compile process. These errors waste time and lower output quality. You can achieve better results by knowing these pitfalls in advance.
Using the work camera instead of shot camera
Users often make a crucial mistake by rendering through the default work camera instead of properly set up shot cameras. This error leads to wrong framing, incorrect lighting effects, and missing post-processing elements. You should first check if you’re viewing the scene through an active scene camera, not the work camera, when you troubleshoot grainy shadows or visual artifacts.
Incorrect file paths or missing assets
Asset management problems can break the sfm compile process. SFM shows a “model not found” error when it cannot find your scene’s models or textures. Here’s how to prevent this:
- Make sure all model and texture files are in the right directories
- Put custom models in the “models” folder and textures in the “materials” folder
- Look for problems with custom assets installed from sites like sfm compile club
Fortnite sfm compile projects show purple and black checkerboard patterns or invisible models when textures go missing. This means the engine can’t find the texture files in expected locations.
Low sampling causing grainy output
Poor quality renders happen because of low sampling settings 99.99% of the time. The shadows look grainy and the overall output appears noisy. Here’s how to fix it:
- Right-click the viewport and select “Render Settings”
- Use at least 256 samples to depth of field (1024 samples give professional results)
- Set up proper ambient occlusion settings
Better quality comes with higher samples, but render times increase. Maximum samples can make rendering take up to 82 times longer than default settings.
Forgetting to check post-processing effects
Post-processing effects substantially affect final output quality. Many sfm compile fortnite creators don’t check these settings before rendering. The depth of field sample count affects shadow filtering, light radius, volumetric lights, and ambient occlusion.
New users often turn off effects completely instead of setting them up properly. This creates flat, unimpressive renders that lack the professional polish you see on platforms like sfm compile club.
Recommended Tools for Post-Production
Raw SFM animations need good post-production tools to become polished final products. The right software can turn basic projects into professional-looking animations.
VirtualDub for image sequence conversion
VirtualDub remains the best choice to handle image sequences from SFM. This free, lightweight tool works great at turning TGA or BMP sequences into video formats. You can import an image sequence by selecting “File > Open video file” and picking the first image. VirtualDub then automatically detects all numbered frames.
The frame rate needs to match your SFM export settings through “Video > Frame Rate” after loading your sequence. SFM compile projects look best when you use VirtualDub’s x264vfw compression with “Force Keyframes” set to 1 frame.
DaVinci Resolve and HitFilm Express for editing
DaVinci Resolve and HitFilm Express are great editing tools that work well with SFM compilations.
DaVinci Resolve started as color correction software but grew into a complete post-production package. Hollywood professionals used it on movies like Deadpool 2 and La La Land. The free version has almost everything except tools that only high-end professionals need, which makes it perfect for serious SFM creators.
HitFilm Express looks and feels more like Adobe Premiere. YouTube creators and editing newcomers find it easier to learn. You’ll need to buy add-ons to access all effects.
Complex SFM compile Fortnite animations benefit from DaVinci Resolve’s color grading tools. HitFilm shines with its visual effects capabilities.
Audacity for sound design
Sound design makes animations better, but many SFM creators don’t give it enough attention. Audacity works great as an audio editor to process sound effects, dialogue, and music tracks.
SFM compile club projects often need unique sci-fi sounds. Audacity’s filters, equalizers, and dynamics processors let you shape sounds extensively. Starting with SFX library sounds works best for complex audio. Adding delays and reverb effects helps create unique atmospheric elements.
Summing all up
Becoming skilled at SFM compile helps realize the full potential of Source Filmmaker as a powerful animation tool. We’ve explored compilation’s technical aspects in this piece – from its basic purpose to completing your first successful render. Of course, the process can feel overwhelming initially, but these techniques become second nature with practice.
Proper compilation connects your creative vision to a polished final output. Setting up scenes correctly, picking the right output formats, and optimizing render settings will improve your animation’s quality. It also helps to use image sequences instead of direct video exports, which offers better quality and protects against lost work.
New users often make mistakes like using work cameras instead of shot cameras or setting low sampling rates. All the same, you can avoid these issues with your new knowledge. Your skills will grow as you try post-production tools like VirtualDub, DaVinci Resolve, and Audacity to raise your creations to new heights.
SFM’s community keeps expanding despite the software’s age, making tutorials and asset libraries accessible to more people online. Patience plays a key role as you learn. Your initial compilations might not match professional work right away, but each project teaches you something valuable.
This piece gives you the technical foundation to start your experience, whether you create content for fun or want to join award-winning SFM filmmakers. Every impressive animation starts with understanding simple compilation principles.
Here are some FAQS about SFM compile:
What is SFM compile?
SFM compile refers to the process of rendering and exporting animations or scenes created in Source Filmmaker (SFM) software. The term sfm compile club often describes communities where creators share compiled SFM projects and techniques. These compilations can range from game animations like fortnite sfm compile to various creative projects.
What is SFM compile club?
SFM compile club typically refers to online communities or groups dedicated to sharing and discussing Source Filmmaker compilations. These clubs often feature specialized content categories including sfm compile futa or fortnite sfm compile projects. Members collaborate on rendering techniques, asset sharing, and compilation best practices.
How to make a Fortnite SFM compile?
Creating a fortnite sfm compile requires importing Fortnite character models and assets into Source Filmmaker software. The sfm compile fortnite process involves animating scenes, setting up cameras, and properly rendering the final composition. Many creators share their fortnite sfm compile projects in specialized communities for feedback and exposure.
What does SFM compile futa mean?
The term sfm compile futa refers to a niche category of SFM animations featuring futanari characters. Like other sfm compile projects, these involve the same rendering and exporting process in Source Filmmaker. Such content is typically shared in specific online communities that cater to adult-oriented SFM creations.
Popular platforms for sharing sfm compile projects include SFM-specific forums, Discord servers like sfm compile club communities, and video hosting sites. For game-focused content like fortnite sfm compile, creator hubs and game forums often have dedicated sharing threads. Always check platform guidelines before posting adult-oriented sfm compile futa content.
What software is needed for SFM compiling?
The primary software for any sfm compile project is Valve’s Source Filmmaker, available for free on Steam. Additional tools might include video editors for post-processing fortnite sfm compile projects or model editors for custom assets. Many sfm compile club communities share recommendations for essential plugins and utilities.
How long does SFM compiling take?
The duration of an sfm compile varies greatly depending on scene complexity and hardware specs. Simple fortnite sfm compile projects might render in hours, while elaborate sfm compile futa animations could take days. Factors like lighting, particle effects, and resolution significantly impact the sfm compile processing time.